Bea Cook is an English teenager who was contacted by John Watson in order for her to solve paranormal mysteries along with her friends.
History[]
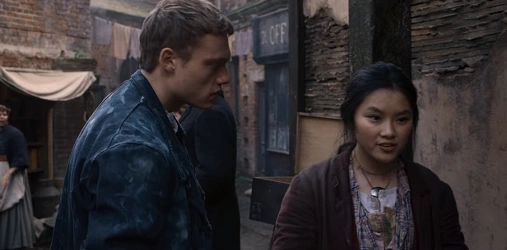
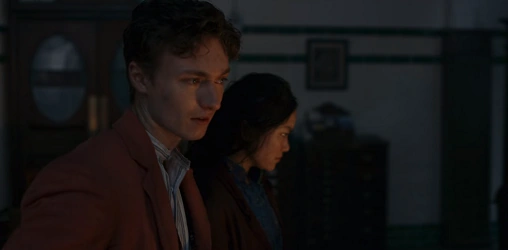
In Victorian London, half-sisters Bea and Jessie live with their friends Billy and Spike in the cellar of a pub called the Duck and Quiver. Jessie has nightmares of being trapped in a dark cave with a threatening creature. In the morning, Bea and Jessie acknowledge Bea's 17th birthday before noticing Spike and Billy are missing. Bea goes to search for them. As she steps out, she spots a man watching her from 221B Baker Street. Bea finds the boys at an underground boxing ring, where Billy is preparing for a match. She forces him to leave.
In the cellar of the Duck and Quiver, Bea confronts Billy about his fighting. Billy insists that they need the money to pay for a doctor for Jessie, and to pay back to their landlord, Mrs Hudson, who is threatening to kick them out. Bea becomes upset when Spike suggests they consider the workhouse. During the conversation, Jessie slips out of the cellar and wanders into the street in a trance. She sees a sinister figure in an alley, and runs in front of Leo's carriage, with Bea saving her at the last moment. Daimler gets out and scolds Bea, but she stands up to him, impressing Leo. The carriage drives off as Bea comforts Jessie.

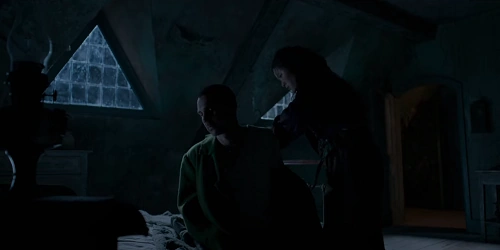
Bea was approached by Watson so that she could solve a paranormal mystery with her friends.
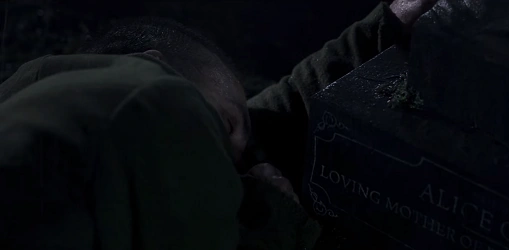
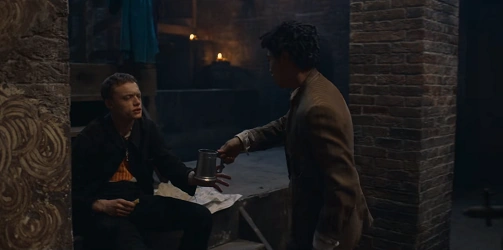
Concerned about her sister, Bea meets with her mother's friend, Sister Anna, at her mother's grave. Bea points out that her mother, Alice, had strange dreams also before her death, but Sister Anna dismisses the thought. After she leaves, Bea spots the same man from 221B watching her, and runs away. He chases her, finally catching her in an alley, and offers to pay her for some work. The man introduces himself as a doctor, and reveals that he and his partner run an independent detective agency. He explains that for their current case, they require the help of someone familiar with the disreputable parts of London. Four newborn babies have recently disappeared, with the most recent kidnapping happening the previous night from an upstairs room with a locked window. Neither the older sister, who shared a room with the infant, nor the mother downstairs saw anyone. The only clue was a single raven feather found beneath the crib. The Doctor explains that the sister, Susan Shipley, has now also disappeared, and offers to pay Bea if she can locate the girl. Bea agrees.
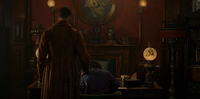
Bea returns to 221B, where she reports that Susan was killed and tries to end her involvement with the case. However, the Doctor refuses to pay her unless she brings him more information about the crimes. When he briefly steps into another room, Bea notices another man laid out on a couch in the back. The Doctor quickly returns with a list of the other missing babies, which Bea angrily takes and storms out.
Bea and her friends go to confront the kidnapper. Jessie asks to come, but Bea flatly refuses, and expresses concern for Jessie's health. She leaves angrily with Spike. Bea gives Billy a decoy baby, and he climbs into the room to place it in the crib. However, while he is distracted by trying to prevent the mother from entering, a raven flies in and grabs the infant. The teens chase the raven, which delivers the baby to a hooded man. Billy confronts him about the kidnapping, but the man claims the baby is his. When Billy moves to grab it, the man releases a swarm of birds from beneath his cloak and disappears. Bea realizes that the man is looking for his lost child, and connects it to the sixth baby that died in the hospital. She reviews the birth register, and learns that the mysterious man is Arthur Hilton, the head ornithologist at the London Zoo.
Bea, Leo, and Billy find Hilton's hideout in the zoo's aviary, but are suspicious when they see no birds in the structure. They confront Hilton, and Bea tries to convince him that his baby is dead. However, he insists that someone swapped out the infant, and summons the birds to attack the group. Jessie and Spike arrive and manage to run inside just as Bea closes the doors. As the birds dive-bombing the windows in an attempt to enter, Jessie runs over to touch Hilton. She enters his memories, and learns that after her death the baby was taken to the morgue without Hilton ever getting the chance to see her. Unable to cope with his grief, he blocked the memory and fell under the delusion that his baby had been stolen. She also witnesses Hilton gain his powers through use of a spirit board. Overcome with the realization of his actions, Hilton breaks down and releases his control over the birds. Billy finds the missing babies upstairs, and Leo runs away.
Bea returns to 221B to collect her payment. Finding the door open, she enters to the sounds of a fight and sees Waton getting up off the floor as someone jumps out a back window. The Doctor pays her, and tells her that all the babies were returned to their homes and that Arthur Hilton has been committed to Bedlam. Bea demands that the Doctor tell the truth about why he needed their help, and he reveals that something dark has come to London and that he will need Jessie's powers to stop it.
Still short of money, Bea is arrested for stealing a bracelet and jailed, where she is visited by the Doctor. Despite Bea having decided not to work for him again, she is forced to agree to help him when he threatens to have her sent to the workhouse unless she investigates another case. The Doctor informs her of two bizarre recent incidents where all of a child's teeth were stolen out of their mouths by someone whom the press have dubbed the "Tooth Fairy". He provides her with the victim's addresses, and tells her that a ghostly woman was seen at both locations. Bea tells him that Jessie thinks people are getting strange powers from somewhere, and again asks how her employer knew about Jessie's abilities. However, the Doctor refuses to answer either question.
Billy was upset they had to keep working for Watson, but Bea told him they did not have a choice.
Back at the Duck and Quiver, Bea convinces Spike to break in to 221B to learn more about the Doctor and what he knows. Meanwhile, she and Billy will investigate the crimes. Jessie insists on coming with them as she is the only one with psychic abilities. Billy is upset that they are working for the Doctor again, but Bea maintains that they have no choice. Meanwhile, Leo has once again managed to escape the palace with the assistance of his sister Louise. He finds the other teens just as they are leaving for the investigation. However, he gets a cold reception. Bea angrily tells him to help Billy with the interviews before storming off. Across town, a young girl who loses a tooth is shocked when she discovers that instead all of her mother's teeth have been removed.
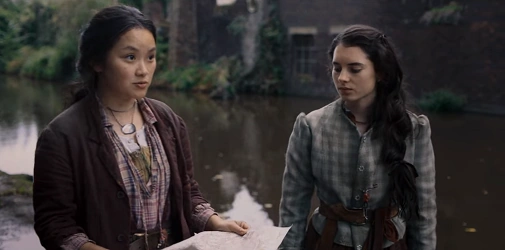
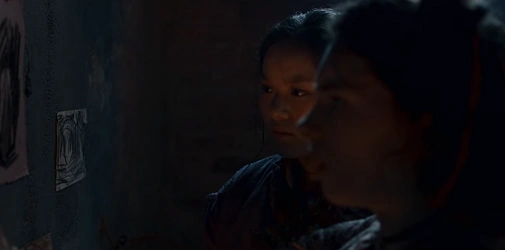
Bea and Jessie investigated sightings in Balham.
Meanwhile, Bea and Jessie investigate the area of the sightings in Balham. Jessie insists they split up in spite of Bea's misgivings. Jessie follows a young boy into a dilapidated building, out front of which is an old dentist's sign. She finds a woman buying something in the yard. Jessie explains that she is investigating the strange occurrences in the area, and the woman invites her inside. They go upstairs, where the woman knocks Jessie out with her breath.


Bea and Jessie managed to restrain the Tooth Fairy so Jessie could enter her mind.
In Balham, Bea notices Jessie is missing, and goes searching for her sister. She sees the dentist's sign, and enters just in time to stop the Tooth Fairy from pulling Jessie's teeth. They manage to restrain the woman by tying her to a chair. Bea finds a spirit board and tries to interrogate the woman about her powers, but the woman is unresponsive. Jessie enters the Tooth Fairy's mind, and sees a memory of her attempting to contact her father through the spirit board as she gained her powers. She also witnesses the woman's discovery of her father's body after his suicide. However, the woman then grabs Jessie and drags her into one of Jessie's own traumatic memories of life in the workhouse. Jessie leaves the Tooth Fairy's mind, and tells Bea that she thinks the woman is trying to get revenge on someone she blames for her father's suicide.
Jessie goes to find Leo and Billy, leaving Bea alone to interrogate the Tooth Fairy. The woman tries to convince Bea that the two of them are the same, and insists that if Bea knew her mother had been killed she would act the same way. Outside, Jessie returns with Leo and Billy. They notice a jawbone apparently growing in the dirt. Bea joins them just in time to see a clone of Carla Machin emerge from the dirt and run off with the clone of William Cooper that Jessie saw earlier. Bea realizes the Tooth Fairy is creating clones from the teeth she stole. The group returns upstairs to try and determine the intended victim. Bea remembers that the woman earlier said her father lost everything due to the land under the building, and Leo says that the land belongs to the wealthy Duke of Winchester. He realizes that William Cooper's father, John, must be the duke's bodyguard, while the duke will that same night be sponsoring a gala at the theater where Carla Machin works. They send Billy to go warn the duke.
Bea tries to convince the Tooth Fairy to let go of her quest for revenge on the Duke. However, the woman insists the only way to stop her is to kill her. As the duke enters the theater and begins to give a speech, the Tooth Fairy possesses Carla's clone. She interrupts the duke, and point a gun at him. She denounces the duke for raising rents on his land and driving her father into poverty. To prevent his daughter from being saddled with his debts, her father killed himself. As she gives the speech, Bea considers killing the Tooth Fairy to save the duke, but ultimately decides that she can't do it. Billy, meanwhile, arrives at the theater and convinces John Cooper that his injured "son" is actually a copy. Together, they manage to stop "Carla" from shooting the Duke, and the clone is apprehended. The crowd scatters, and Cooper directs Billy to guard the duke and his wife and daughter in a dressing room.

Bea was forced to kill the Tooth Fairy in order to save Billy.
Back in Balham, the Tooth Fairy angrily reacts to the failed assassination and mocks Bea for thinking that she is more moral than her. However, Jessie notices that the third skull that was earlier in the garden has disappeared. Realizing that the danger isn't over, they wonder who the third clone is, and when the Tooth Fairy possesses the clone they are horrified to hear her greet Billy. In the dressing room, the duke's wife suddenly pulls out a knife and stabs him. Billy attempts to disarm her but is soon overpowered and the "duchess" goes to stab him in the throat. To save him, Bea is forced to kill the Tooth Fairy, which immediately kills the clones as well. However, Bea is traumatized by her action.
Bea visits the Golden Dawn's headquarters, where she finds Mycroft Holmes waiting for her.
At the London headquarters of the Order of the Golden Dawn, Bea meets with Mycroft Holmes. Mycroft reveals that his brother, Sherlock, is Watson's business partner, and that he has been trying to get Watson to introduce Bea's group to him. Mycroft explains that he needs their assistance. Richard Wynn, the leader, or "magus", of the Golden Dawn's London chapter, was recently found murdered, with his body posed like the Tarot card "The Magician". Mycroft suspects that as a new magus is only elected on the death of the previous leader, and only from among the elite members of the order's inner circle, the culprit must be among this group. Mycroft asks Bea and her friends to join him the following day, when he convenes the inner circle at his estate outside the city. In exchange, he promises to pay them double and tell them whatever they want to know about Watson.

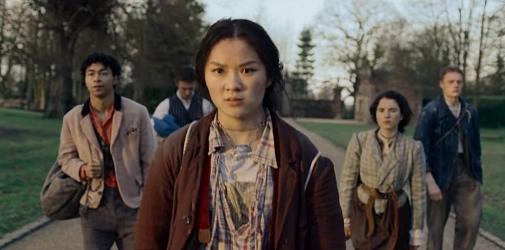
The group of teenagers all walked together to Mycroft's estate.
The group arrives at Mycroft's estate after a tense morning between Billy and Leo, who did not return to the palace. Bea suggests they use the opportunity to investigate Sherlock as well as the murder. They are greeted by Mycroft's servants, who inform them that while Bea and Jessie will be posing as Mycroft's nieces, the boys will pretend to be servants. A maid shows Bea and Jessie to their rooms, where they dress for the evening. Downstairs, Leo and Billy work in a coal cellar and have another tense exchange around Bea, whom Leo realizes Billy has a crush on.
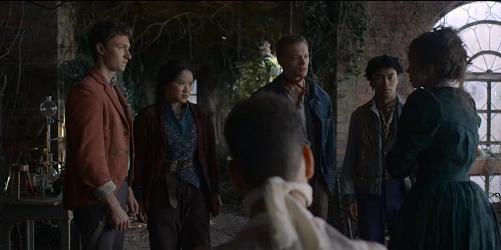
In the drawing room, Mycroft points out the various suspects to Bea and Jessie. The guests are Alan Crawley, the Golden Dawn's longest-serving member; the novelist R. P. Breakwater; Dion Cross, wife of a cabinet secretary; the engineer Gustav Felkin; and the actress Patricia Colman Jones. Mycroft briefly introduces the girls to the others before sending them out. Mycroft's butler shows them a hidden peephole, where they can keep an eye on the assembly. Crawley proposes voting for the next magus immediately and puts forward his own candidacy. Mycroft agrees to put it to a vote.

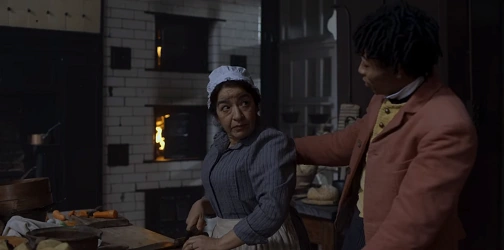
Spike was able to talk to the cook, Mrs. Brown who told him about Sherlock.
In the kitchen, Spike talks to the cook, Mrs Brown, to learn more about Sherlock. Mrs Brown reveals Sherlock left about 15 years ago after falling in with a "bad man" and moving to Baker Street. She also says that the last time she saw Sherlock was when he came back to hide something in his old room in the attic. Leo and Spike find the room, which looks like a laboratory. Higher up in the attic, they find an locked puzzle box.
Downstairs, Bea and Jessie witness the Golden Dawn's election ceremony, where Gustav Felkin is elected as the new magus. Following the ceremony, they head to bed, where Jessie teases Bea about choosing between Leo and Billy. They are roused by screams from downstairs. They find everyone gathered in the drawing room, where Gustav Felkin has been murdered, with his corpse posed among several swords.


At the meeting late at night, the group had to investigate who had murdered Felkin.
The gang leaves, deciding to let the police deal with a straightforward case of murder. However, as they walk away they inexplicably find themselves heading back towards the house. No matter which way they go, they find themselves unable to leave the estate. Leo realizes Felkin was posed as the Eight of Swords, a Tarot card portending imprisonment. He realizes that someone is using the Tarot cards to access the Rip's power. Bea decides they need to determine why someone wanted to trap all the people there, and they return to the house.
Mycroft convenes a meeting, revealing the teenager's identity as special investigators. Crawley recognizes the spell on the house after noticing the sky has not changed for several hours. Bea and Billy set up in the library to interview the suspects. When Mrs Brown brings them tea, Bea notices an expensive bracelet on her wrist. They first interview Patricia Colman Jones, who discovered Felkin's body. She says that she had stayed up late drinking with Mrs Brown, and had found the body on her way back to bed. She also says that she saw R. P. Breakwater in the hallway. Bea goes upstairs to check on Leo, who is attempting to open the puzzle box. Together they solve the riddle, and find inside a Sherlock's grimoire, containing spells and methods to contact the dead.
Spike looks for Jessie in the attic, and tells Bea and Leo that she is an ipsissimus. Leo finds an entry for ipsissimi in the grimoire, which reveals that one can steal an ipsissimus' power by sacrificing them with dark magic. Bea realizes that the whole meeting is a trap to catch Jessie. Downstairs, Jessie is cornered by Crawley, but manages to get away. Meanwhile, the other four friends look for Jessie. Billy insists Breakwater and Dion are not behind the killings, but Bea is unconvinced. However, they soon find the pair murdered in Dion's room. Bea realizes they were lovers, explaining why Breakwater wouldn't reveal his alibi. Leo explains "The Lovers" means infatuation. Spike also notices that Dion wrote the Roman numeral XV with her foot, corresponding to the card "The Devil". Bea remembers that Mycroft was dressed up as the Devil during the ceremony earlier, and the group rushes to find him. Meanwhile, Jessie hears a woman's voice calling to her, and leaves the house under an enchantment.

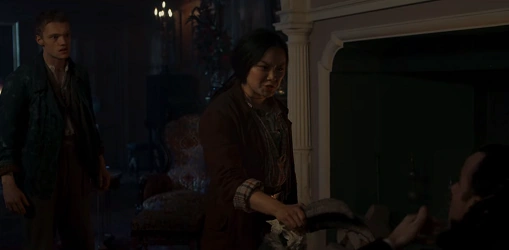
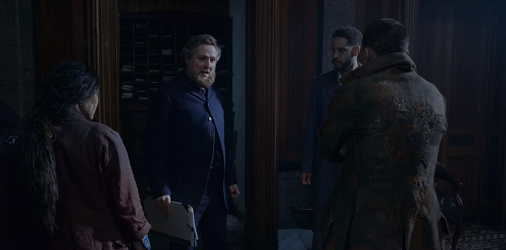
The group confronted Mycroft when they believed he was the killer.
The group confront Mycroft downstairs, and Bea explains her theory of the crime. Mycroft learned about Jessie's powers from Sherlock and Watson. He killed Wynn to lure them to the estate, then killed Felkin to trap them there. When Breakwater and Cross learned discovered his plans, he killed them as well. However, Mycroft denies everything. He tells them he hadn't talked to Sherlock or Watson in a decade. He also denies telling anyone in the Golden Dawn about Jessie, but Bea realizes he did tell Mrs Brown. She connects Mrs Brown's diamond bracelet to Patricia, and realizes the actress is behind everything. Patricia then bribed Mrs Brown for information about Jessie, then used Wynn's murder to cast a manipulation spell on Mycroft so that he would bring the girl to her. After murdering Felkin, she bribed Mrs Brown again with the bracelet to provide an alibi for herself. With Mycroft's name cleared, Billy suggests that Dion died before she could finish writing the numeral XVI, corresponding to the card "The Tower".
Back in the house, Bea and the others meets with Mycroft. He admits that he is the head of a government department overseeing paranormal research. While his job was initially considered a joke, he soon realized that the Golden Dawn was on to something. Needing someone who could bridge the gap between science and magic, he enlisted his brother Sherlock. Unfortunately, Sherlock became obsessed with the subject. Mycroft reveals that there was another Rip, fifteen years ago, though he does not know who opened it or how it was closed. However, Sherlock was never the same afterwards. Mycroft blames the change on Dr Watson, and suggests that he is probably involved with the current crisis. He pays Bea and the group leaves.
Back in the cellar at the Duck and Quiver, Billy informs Bea that he has met a girl. After he leaves, she goes over to Leo, who is reading the grimoire. He finds some old photos in the back, including one of Watson with a woman whom Bea immediately recognizes. She realizes the mysterious "A" mentioned in the grimoire as Holmes' assistant was none other than her mother, Alice.
Leo goes with Bea and Jessie to visit the grave of their mother, Alice. They discuss the recent revelation that Alice had known Dr Watson and Sherlock Holmes. Leo suggests that Alice was probably an ipsissimus like Jessie, and that the two men were probably using her for her power. He shows her some entries in Sherlock's grimoire that suggest Alice had not taken part in their experiments willingly. Jessie wonders if Sherlock and Watson killed her. Bea says they need to find a way to talk to Sherlock, believing him to be the key. They return to the Duck and Quiver, but Bea becomes angry when Leo tells her he needs to leave again. He promises to meet her back at the pub at ten that night.
Dr Watson summons Bea and Jessie to 221B. He tells them about the recent murder of a man named Paul Cambridge, whose face was removed by the killer. The murderer had been identified by several witnesses as David Oliver; however, Oliver himself had been found dead several days before the crime, also with a flayed skull. Watson tells them the case is being investigated by the regular police, but that Lestrade, the inspector in charge, has requested Jessie make her abilities available. Before leaving, Bea asks to meet with Holmes. When Watson denies the request, Bea rushes upstairs and discovers that Holmes is missing. To Watson's fury, Bea promises to find Holmes and uncover everything that Watson has been hiding from them.

Bea asked Mrs. Hudson about Sherlock.
Across town, Bea meets with her landlady, Mrs Hudson, to pay off their back rent. As Mrs Hudson also owns 221B, Bea asks her if she knows anything about Holmes, but the landlady dismisses him as a drug addict. Bea shows her the photo of her mother, and Mrs Hudson immediately recognizes her, recalling that the tenants often complained about her screaming. Mrs Hudson gives Bea the name of a Limehouse opium den that Holmes frequents, but warns her to stay away from him.
In Limehouse, Bea looks for Holmes at the opium den. She spots Watson and turns the guards against him by telling them he is with the police. However, she is also forced to flee when another addict reveals that Bea was also asking questions. She and Watson hide in a closet together.

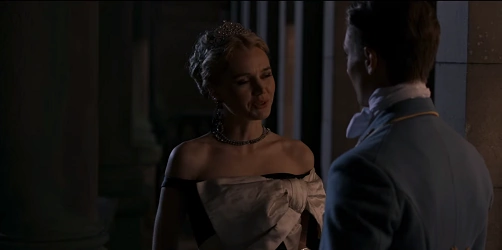
Leo decided to leave the party in order to meet up with Bea.
Back in Limehouse, an opium addict gives Bea the name of a hostel where Holmes might be. Bea goes to the hostel, where the clerk gives her a mocking note from Watson. The note reveals that Watson paid off the addict, and announces that the doctor is terminating her employment. She returns to the Duck and Quiver, but Leo is still at the party and misses their meeting. Leo belatedly realizes how much he misses Bea and decides to escape. Daimler catches him on a balcony and rebukes for being ungrateful for all he has. He tells Leo he can never have a normal life due to his condition. However, to Daimler's horror Leo jumps off the balcony and runs away as Daimler calls for the guards.

Sherlock was passed outwhen Bea visited her mother's grave.
Back at the Duck and Quiver, Jessie tells Billy and Spike that Clara overpowered her and ran away, though they express skepticism. They are surprised to find an injured Leo laying in a cot. In the yard, Bea runs into Mrs Hudson. She asks Mrs Hudson whether Sherlock began using drugs around the time her mother disappeared, which Mrs Hudson confirms. Bea notices that her mother is wearing a ring in the from Sherlock's grimoire, and realizes she and Holmes were together. The epiphany leads her back to Alice's grave, where she finds Sherlock passed out.
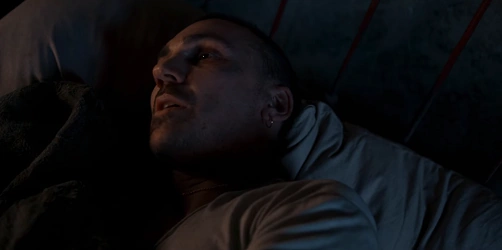
Bea helped Sherlock sober up.
In the present, Bea settles an inebriated Holmes in a dingy room to recover. Holmes thanks her for helping him (and not taking him back to 221B), but Bea says she only wants information about her mother and the Rip. Holmes tries to impress her by deducing the type of tea that she has served him, but fails. Bea goes downstairs to check on Leo, who is still recovering from his jump from the palace balcony. He admits that there are people looking for him. Bea returns to Holmes, who tries to justify his mistake with the tea and tells her he was once quite famous for his abilities of deduction. He reveals that he met Watson when they became housemates during Holmes' investigation of the case of Jefferson Hope. They formed an agency together, but things changed when strange supernatural occurrences began happening. Realizing they needed special assistance, Holmes recruited Alice on Mycroft's recommendation.
Bea rushes to the cellar to tell Jessie that Holmes is talking about their mother. However, Jessie decides not to join her. She explains that the Linen Man told her she could find the sources of the Rip in her nightmares, and so she is trying to fall asleep. On the street, Billy watches Bea leave. Spike convinces him to try meeting another girl, but as he walks over to introduce himself to some girls a man bumps into him. Billy is disturbed when he recognizes the man and tries to follow him, but loses him in the crowd.
Upstairs, Sherlock shows Bea a tattoo on his ankle with the initials of "The Irregulars". Alice had got the same tattoo, but Watson had refused. He continues with his story. After solving the Langtree hypnotism case, Holmes celebrates his success with Watson and the police. He begins to explain how he solved the case, but this irritates Alice, who leaves the room. Holmes follows her into the hall, where she confronts him about his arrogance. She says that while people enjoy his deductions because they create the illusion of an orderly world, they are on the brink of something chaotic and without reason. Watson enters just as they kiss. Bea is disturbed to hear Holmes claim that he and her mother loved each other. She confronts him about the evidence Mrs Hudson gave of Alice screaming. However, he says that the screaming was not a result of their experiments, which Alice took part in willingly, but of her nightmares.

Jessie told Jessie to go talk to Sherlock.
Meanwhile, Jessie enters into a nightmare to look for the Rip. She finds herself in a dark cavern filled with bones. She is attacked by decayed corpses, who keep repeating the world "circle", but manages to escape by pressing the moth on her wrist. She wakes up on the street with Bea crouching over her. Jessie tells Bea she doesn't want to ever go back into the nightmares again, and Bea tells her she might not have to. She tells Bea that their mother had nightmare just like her, and asks her to come talk to to Sherlock. However, Jessie is reluctant to do so and leaves.
Bea walks in on Leo dressing, and he is ashamed of her seeing his bruises. They share a quiet moment together and dance, but it ends awkwardly and Bea leaves.
To Holmes’ shock, when Watson returns he reports that the head botanist, Edith Dubois, determined that what Holmes thought was hawkweed was merely tarragon. Holmes cannot believe he made a mistake, as without the hawkweed they have no other clues to go off of. Watson tries to convince him to go to a pub like old times, but Holmes insists he has to watch Alice. At this point, back in the present Holmes begins having severe withdrawal symptoms and asks Bea to get him some drugs. Bea refuses and demands to know what was wrong with her mother, but Holmes says he won’t tell her anything else unless she gets him the drugs.
Elsewhere, Billy follows Vic Collins to his house. Spike catches him and tries to convince him to drop his plan for revenge. However, Billy admits that the beatings he had told Spike about had actually happened to Bea, and Billy feels guilt because he couldn’t protect her. He angrily pushes Spike to the ground and tells him that he is big enough to do something about it now.

Sherlock told Bea his story while she told him she would give him drugs.
Back at Baker Street, Bea brings Holmes a packet of drugs and he continues his story. As Bea suspected, Holmes confirms that Alice was pregnant with Jessie, and that he was the father. Jessie meets with Holmes, but tells him she doesn’t want anything to do with him. She only asks what here mother saw in her nightmares; Holmes replies she saw executioners, hanged bodies, and triangles.
Jessie storms out of the room. Bea vents her anger at Holmes for letting them think their mother went mad and drowned, and for abandoning them. Holmes tries to apologize but she rejects his offer of help. Holmes tells her that he made many mistakes, but what happened with the Rip wasn’t his fault. He tells her that he has been suspicious for years how Watson found out about the Rip. As Bea leaves, he asks her for the drugs, but to Holmes’ fury Bea reveals the packet contains only sugar.
Back at the Duck and Quiver, Bea and Jessie talk about their meeting with Holmes. Bea apologizes for pushing Jessie to meet him, and expresses her disgust for him. However, Jessie admits that she doesn’t feel anything about her father. She thanks Bea for always being there for her and loving her as a child, and tells her not to waste her energy hating Sherlock. Bea tells Jessie that she agrees with Holmes on one thing - she suspects Watson is actually behind everything, and intends to prove it.

Bea comforted Leo, telling him he should not be ashamed of his body.
Bea brings Holmes some more tea, and sees that he has sobered up a bit. Holmes apologizes again, and insists he loved her mother. Holmes again attempts to guess the type of tea Bea served. He guesses incorrectly, but Bea humors him by pretending he gave the right answer. Bea returns to the cellar, where she asks to see Leo’s bruises. She tells Leo not to be ashamed of his body or hide anything more from her, and the two have sex.
Bea and Leo are trailing Dr Watson, hoping to learn more about his involvement with the Rip. They follow him to a hospital, where discover a number of people with missing body parts and the wounds supernaturally healed. Bea realizes this is the same pattern as in Sherlock’s last case, that of the “Collector”, which he never solved.

Leo told everybody he believed
Back in the Duck and Quiver’s cellar, the group meets about the case. Leo suggests that someone is using the stolen organs to build a new person. The culprit had lost their abilities when Bea’s mother closed the Rip the first time, but has now begun their task again. Billy is agitated and doesn’t want to get involved, but Bea insists they have to solve this case in order to find the Rip. Their only other option is for Jessie to find it in her nightmares, but Jessie refuses out of fear. Bea suggests they pick up where Sherlock left off on the case. The only clue he had was the mixture of Snowdonia hawkweed found at the scene of the crime. Remembering that Holmes had sent Watson to a botanist named Edith Dubois to find out more about the rare plant, she asks Leo to find Dubois’ address. This seems to anger Billy, who storms off, as does Jessie, who is upset with the group for trying to cajole her into finding the Rip herself.

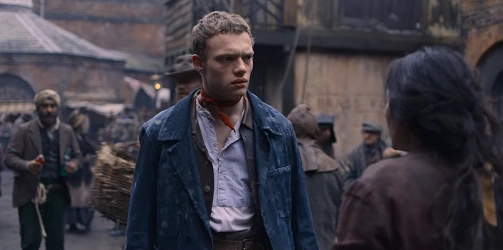
Bea told Billy she knew that he had visited Vic Collins.
Bea follows Billy, and reveals that she knows he met with Vic Collins. Billy explains that Collins told him the truth about his parents. He tells Bea that wants to hurt Collins for what he did to her, but Bea convinces him to let go of his plans for revenge by saying the group needs him. Meanwhile, Leo is heading for the records office when he sees a royal servant. He ducks into a pub to avoid him, but finds himself face-to-face with Daimler. Daimler tries to convince Leo to return to the palace. However, Leo realizes Daimler has not yet told the Queen about his escape and blackmails him into letting him stay by threatening to have him fired for negligence.
Bea, Billy, Spike, and Leo visit Edith Dubois’ house and find it abandoned. It has also been partially ransacked, presumably by Watson. Bea finds photographs of Mrs Dubois with her sickly husband, and Billy finds the botanist’s journal. It describes how, faced with her husband’s imminent death, Dubois planned to put him into a coma and somehow rebuild him. They realize Edith must be the Collector. They wonder what Watson was so desperate to find in Dubois’ house, and why he lied to Holmes about the hawkweed being a dead end. Given that hawkweed requires such specific conditions to grow, it could only conceivably grow in the botanical gardens, so the group heads there to investigate.

Watson was held hostage by Edith.
At the botanical gardens, Bea and her friends break into the head botanists’ nursery. There, they find Dubois attending to the corpse of her husband, Samuel. She reveals that her work is complete, and gloats about her powers over life. However, when she injects the serum into her husband to revive him, it fails. Edith muses that the illness must have spread to his organs, and that she needs more body parts. Bea tries to convince her to tell them more about Watson and the Rip. She even offers not to turn Edith over to the police in exchange for information over Spike and Billy’s protests that Edith will go right back to harvesting body parts if she remains free. When Edith realizes that Bea actually hates Watson, she reveals that she has him locked in a back room.


Bea was angry when she found out Watson was behind the rip all along.
In the present, Bea is outraged to find out that Watson was behind the rip that killed her mother all along. Watson tries to apologize, but swears that he is not behind the current Rip. He threw Edith’s device into the Thames after opening the Rip the first time. However, the discussion is interrupted by Edith. She threatens to break a vial of a toxic chemical if any of them move, which will kill them all.
Bea and her friends meet to discuss the situation. Without any leads from Watson, and with the situation in the city deteriorating, they agree they have to get Jessie to find the Rip on her own. Bea looks for Jessie in the cellar, but instead finds Daimler. He tells her the truth about Leo’s identity. Bea confronts Leo about the revelation, and how he has been lying to the group since they met. She tells him that he put them all in danger for his folly. Leo tries to explain that he just wanted their friendship, but Bea rejects his apology and tells him he was just using them. She tells him to leave and never come back. Defeated, Leo returns to the palace.
Back in the Duck and Quiver’s cellar, Jessie explains to Bea that Sherlock has changed and that he won’t help them. Bea tells Jessie that their only option to find the Rip now is for Jessie to enter her nightmares. Jessie is upset that Bea would ask that of her, but Bea says Jessie needs to grow up because she’s the only one who can solve the problem. Thinking that the Linen Man was right about her friends not understanding, Jessie storms out.
With the situation in London becoming more dangerous, Bea visits Watson at 221B and demands the truth about why he opened the original Rip. Watson explains his history with Holmes, and how Holmes pulled away from him as he grew more famous. He admits that he opened the Rip accidentally in an attempt to impress Holmes by contacting the spirit world. Bea asks why Watson didn’t save her mother when she was taken by the Rip, and Watson confesses that his is in love with Holmes and was jealous of Alice.

Bea, Watson and Holmes were told that the Linen Man had killed the man.
Bea, Holmes, and Watson arrive at Scotland Yard and immediately spot a dead man on the staircase. They are met by Inspector Gregson, who informs them that a man in a linen suit broke in to the archives and stole the files on every case Watson’s group worked on. Bea realizes that the Linen Man plans to use the case files to find a “monster”, as each has the location of the Rip in his or her mind. Watson points out that Arthur Hilton, or the “Bird Master”, is the only they confronted who is one still alive. The group rushes to Bedlam Hospital, where he is imprisoned.
Bea, Holmes, Watson, and Gregson arrive at Bedlam, and are shown to the otherwise empty wing where Hilton is imprisoned. Gregson orders guards positioned on the roof and warns the chief doctor that the Linen Man will soon be coming. Bea is let into Hilton’s cell, and tells him they need his help. She tells him that when the Linen Man arrives, he will enter his head to find the Rip. She gives Hilton a syringe, and asks him to use it on the Linen Man after he does so.
Night has fallen at Bedlam, while Bea and the police wait for the Linen Man to arrive. Holmes and Watson reminisce about the old days. Watson tells Holmes that he was right about the Snowdonia hawkweed and that Edith Dubois was behind the “Collector” case, though he lies to cover up his involvement in the deception. However, Holmes doesn’t care much, saying there are more important things than being right. They are surprised when one of the guards from the roof falls from the balcony, followed shortly by the other. Everyone hides as the Linen Man enters. He goes straight for Hilton’s cell and enters his memories, where he learns the location of the Rip. However, he realizes Hilton is hiding something. Bea and the group hear a struggle, and hurry to the cell. They find Hilton holding the syringe and the Linen Man laying on his cot. However, Hilton begins to accuse Gregson of stealing his baby, and attacks him. While Watson and Holmes attempt restrain Hilton, Bea enters the cell. She checks to see if the Linen Man is dead, but he grabs her and puts her under a trance. Having sedated Hilton, Watson notices the Linen Man escaping and Holmes sends him after him. Holmes checks on Bea, and instructs Gregson to watch her after seeing she has been touched.
Back at Baker Street, Bea and Watson check on Jessie. They cannot understand why Holmes would join the Linen Man, and Bea is particularly upset by his betrayal. As a result of the Linen Man’s touch, she finds herself having visions of her mother, and remembers when her mother left her and Jessie with Sister Anna. Spike arrives at the house with Billy and Leo, who managed to secure Billy’s release. Together, the four friends talk to Jessie, reaching her in her nightmare. This gives her the strength to climb out of the grave and destroy the plague doctors. She also has a vision of workers accidentally breaking into the cavern as part of excavations for the new London Underground, and learns that the cavern is located near Aldgate Station on the Inner Circle Line. Jessie wakes up and tells her friends about her discover, and warns them they have to hurry. Meanwhile, the Linen Man and Holmes break into the construction site at Aldgate, where they find the expanding Rip.
At 221B Bea updates Jessie on what happened while she was trapped in her nightmares. Jessie realizes that The Linen Man must have gone into Bea's head as well. Bea shares how she sees Alice saying goodbye for the final time and that she wasn't even old enough to remember it. But Jessie knows that The Linen Man can tap into any memory as long as it is in your mind. She suggests Bea stay behind; however, Bea doesn't want to hear it.

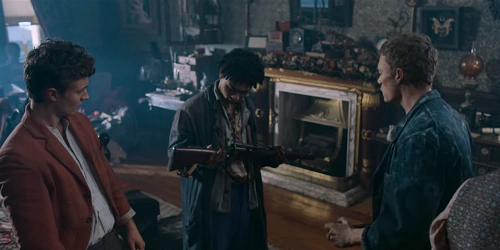
Leo, Billy, and Spike geared up so they could fight if necessary.
In another room, Watson is preparing the boys for the battle to come. He tries to solve the riddle to unlock the weapon's cabinet when Billy takes a smalls statue and breaks the lock. Billy grabs his weapon of choice and then passes a rifle back to Spike. Leo declines a weapon at first, but the rest of the group tells him he will need it and not let himself get caught short. Once the group is armed and ready, they set out to the Rip. The city has fallen to mayhem and Watson warns them that the larger the Rip gets, the worse the mayhem will become. He tells them that he was apprehensive when he first asked for their help because they were children, but Bea reminds him that they still are. At the Rip, we see that The Linen Man has begun the ritual to grant him his god-like powers.
As Bea and the gang make their way through the streets, London goes up in flames. The gang arrives at Aldgate to find the door barricaded shut. Watson has another plan, though. He had checked the construction ordinance before leaving and knows that the old sewer line will run straight into the tunnels. Bea praises him for his smart thinking and he sarcastically replies that she didn’t bring him along for his charm.

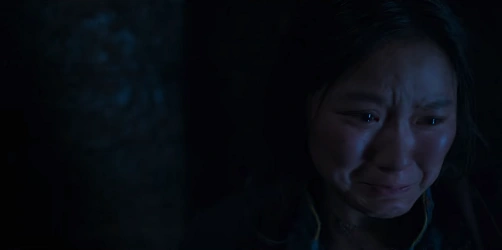
Bea broke down crying when she remembered when she found out her mother was dead.
Billy tries to send Spike down first, but he is too afraid to until something rather large starts heading their way. Once safely in the sewers, Watson warns the group to be as quiet as possible and they begin heading towards the Rip. As they get closer, Bea begins to lag behind. She begins to hear whispers again, but this time they aren’t her mother's. In this new memory, she sees Watson speaking with Sister Anna. She isn’t sure what they are saying, but then Sister Anna turns to her and tells her that something has happened to her mom. Bea breaks down and beings to scream as she relives the memory of finding out her mother was dead. Watson and the rest overhear her and he backtracks to try and help her calm down. Sherlock can hear her cries as well and tells The Linen Man that they have arrived. The Linen Man warns Sherlock that he isn’t done but pauses the ritual to deal with them. Watson helps Bea get back on her feet and the group continues to make their way through the tunnels.
The group begins to separate little by little and a white flash passes by Spike and touches his shoulder. In the next moment, Vic Collins makes his way towards him. The same white flash passes and touches Leo, who instantly gets a nosebleed.The same thing happens to Spike, who instantly falls to the ground terrified. Jessie, Bea and Watson overhear Billy and Spike's screams and Watson realizes that The Linen Man has come for them.
Just before the same white flash moves past them, Watson fires and stops The Linen Man from coming close. Jessie tells them to stay where they are and that she will handle him. Watson tries to stop her, but she runs after The Linen Man. He stays behind to try and help Bea break out of The Linen Man's control. Meanwhile, Leo is bleeding profusely out of his nose, mouth and ears following by Spike screaming out for someone to "help her; she’s dying". It then jumps to Billy being taunted by Vic.
Everyone tries to regroup, but the tunnel collapses and separates Billy, Spike and Leopold from Bea, Jessie and Watson. Billy's leg is broken in the collapse and Bea tells them to head back to the cellar and keep each other safe. Billy is reluctant to go at first but eventually agrees. Spike and Leopold help Billy out of the tunnels while Bea and Watson continue on to find Jessie, who had made her way down to The Linen Man. He is somehow still alive and warns Jessie that if she tries to close the Rip, she will die.
Jessie knows that this is possible but is ready to do the right thing, just like her mother. The Linen Man continues to taunt her by telling her that when he went into Arthur's mind, he didn’t just see where the Rip was but who opened it. She demands to know who it was, but he just says that deep down, she already knows who it is and then dies. Bea asks Jessie who she thinks it is, but instead of answering, Jessie begins running towards the Rip.

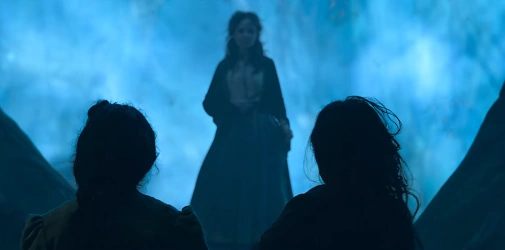
Bea and Jessie watched Alice come back from inside the Rip.
Bea and Watson follow behind her and find Sherlock and the Rip. They all watch as Alice makes her way out of the Rip and breaks it open further. Bea believes this is all in her head, but Jessie tells her that this is real. Above ground, we can see that the streets have gotten far worse as Spike, Billy and Leopold navigate past a cannibal feasting on another man’s flesh. Down at the Rip, we get a sweet family reunion until the topic of the girl’s upbringing comes up. Sherlock apologizes for not being there for the girls and claims he tried, but Bea believes he is lying and that he abandoned her just last night.
Sherlock claims that they are just alike. He and Bea would do anything to be with Alice again, which is why he did it. Alice promises Bea that she is never going to leave her again and from here on out, she will take care of her. Jessie begins to realize that the Rip is only getting worse the longer Alice is outside of it. She asks Alice whys he is opening the Rip.
Alice, explains that she opened the Rip to return to the world of the living. That once it is completely open, she will no longer be trapped there. Jessie understands her motives but is upset that her mother knew this would make monsters out of people. Alice explains that it is only temporary and when the barrier between both worlds collapses, the chaos will be gone. Watson realizes what she is trying to do and speaks up. He knows that when the barrier collapses, this world will cease to exist.
He asks Alice what world she came from. She explains it's a world where spirits who aren't ready to move on remain – purgatory. Watson realizes that she wants to turn the world into purgatory and Alice tells him it will be the end of death. Jessie disagrees with her mother, knowing that this isn't worth the cost they have to pay. Sherlock agrees with Alice, though Jessie realizes they have both been warped by their sadness. She knows she needs to close the Rip, but Alice warns her that it will force her back into the other world if she does. She tries to make her way up to it, but Bea stops her.

Jessie entered Bea's mind in order to remind her that life was worth living.
Bea continues to try and stop Jessie from closing the Rip. In an attempt to help her understand, Jessie enters Bea's mind. Bea accuses her of bringing her worst memories to life, but Jessie wants to show her the good ones. Bea doesn't believe they have any, but they see flashbacks of the gang playing games together in the cellar, Bea and Leo's night together and their first night in the workhouse when Bea snuck into the nursery to sleep next to Jessie, Bea begins to realize just how happy her life has been.
At the Rip, Bea explains that while she and Sherlock might hurt the same, they are different. Alice doesn't want Jessie to close the Rip and be forced to leave, but Bea knows now that it must be done. She realizes it wasn't the grieving that hurt them but the fact that they didn’t grieve at all that did. Bea hugs her mother and thanks her for giving her the chance to say goodbye. Alice turns to Sherlock, asking for help, but he understands now that it isn't about them anymore but about the girls. He tells Alice she needs to go back as well. Watson warns Jessie that the Rip is collapsing and she needs to close it. Jessie beings to close the Rip as the scene flashing back to the basement.
Jessie continues to close the Rip, with Bea anchoring her to this side. Alice says goodbye to them and tells them that she loves them before she gets sucked in. Sherlock then turns to Watson and tells him that he has been a better friend than he ever deserved. Confused, he watches Sherlock run-up to the Rip and put his hand in as well. Jessie cries out to him to stop and calls him dad for the first time. Watson tries to hold him back as Bea fights to keep Jessie on this side as well.


After letting Holmes go, Watson was able to help Bea save Jessie.
Watson and Bea are still struggling to hold onto Bea and Sherlock. Jessie loses her footing and Bea struggles to keep her steady. She calls out to Watson to help her, but he refuses to let go of Sherlock. Bea continues to beg, telling him that he can let Sherlock go, that she needs his help to save her. He finally lets go of Sherlock, who is pulled into the Rip and grabs ahold of Jessie. The scene then flashes back and forth between Leo and Sister Anna to Jessie, Bea and Watson until Jessie can finally close the Rip. With Watson's help, Bea keeps her sister from being dragged in. Bea struggles to come to terms with what happened and Watson tells her that they're gone.
The next morning, Billy, Spike, Jessie, Bea, Leopold and Watson meet at Alice's grave and place flowers on her tombstone. Bea gives a beautiful eulogy for Alice and Sherlock. The group gets ready to take their leave and Bea and Watson are left at the grave. Bea asks Waston what he will do now. He isn't sure what he will do, but he thinks he can find something. Bea invites him to come over for fish and chips, but he declines and says he has dinner plans.

Spike and Billy celebrated the closure of the Rip.
Back at the cellar, the group digs into their dinner. Leo asks Bea if she would take a step outside with him. Leo tells Bea that he can't stay for dinner and has to return to the palace. He promised his mother he would go to Europe and leaves the next day. He explains that because he is a royal, he has expectations of who he needs to marry. Leopold says that he likes Bea, but he has to marry who he is told even if he doesn't like her. Bea is confused with why Leo is going along with this. He explains that he loves her, but he has to go along with this. Bea tells him that he can do whatever he wants, that after spending all this time, she thought he would have changed. But Leo shares that he has to do it because this was the only way he could get them to agree to help Billy. He gave up his freedom for Billy's. If he doesn’t go back, they will arrest Billy again. He doesn't want Billy to know, though and asks Bea to keep it a secret. Bea finally understands why Leo has no choice. He explains that he didn't try to trick her but was trying to be his real self around her and the rest of the group. That he was happy that she liked him when she didn't even know he was a prince. She asks him if this was real and he reminds her that this was all real. Leo heads off to the palace and Bea finds herself at 221B. She finds Watson home alone, having lied about having dinner plans. She offers to share her fish and chips with him.

Watson comforted Bea and told her he would be there for her.
Bea and Watson are sharing the fish and chips as they talk about his past. She asks him if he didn't get an Irregulars tattoo because he felt guilty, but he says it is because they are vulgar. Bea thought it might have been because Watson is kind of a chicken. He tells her that if she gets a tattoo, he will and Bea shares with him that she already has one. Bea then asks him how to stop loving someone because it hurts too much. Watson responds that you don't and Bea breaks down. Watson gets up to leave but turns back and comforts her instead. Bea tells him that everyone leaves her, but Watson promises that he is here and won't be going anywhere.